Battery-powered Arduino

Contents

Running an Arduino on battery power is only useful, if you know, when to change the battery. Here it is handy, to measure the current battery level and get notifications, if it drops below a certain threshold. Thankfully you can use the analog Pins to measure a voltage.

If you attach a voltage to e.g. A0, your Arduino will compare the input voltage with a reference voltage (by default VCC) and return a value between 0-1023 where 1023 means, that the input voltage is equal or higher than VCC. Afterwards you can calculate the actual voltage by simple math:

Vanalog=Vvcc1023Aanalog V_{analog}=\frac {V_{vcc}}{1023}\cdot A_{analog}

So for example if you measure 768 on the Pin, you can calculate the attached voltage:

Vanalog=3.3V1023768=2.47V V_{analog}=\frac {3.3 V}{1023}\cdot 768 = 2.47 V

This works fine as long as you know your VCC which is not true for battery powered Arduinos. Luckily the Ardunio has an internal Reference Voltage of 1.1V 1 that can be used for comparison.

Since you can only measure voltages below the reference voltage you need to apply some magic in form of a Voltage divicer to map the voltage to a range of 0 to 1.1V.

Voltage divider

The lengthy wikipedia article 2 on voltage dividers gives a good introduction how this circuit works.

/assets/img/2017-08-24-arduino_battery-640.jpg

In summary you will need two resistors R1 and R2 which are hooked up between your analog pin and Vcc and GND.

Depending on the value of the resistors you can measure different ranges of voltages, even high above the threshold your Arduino is capable of survice.

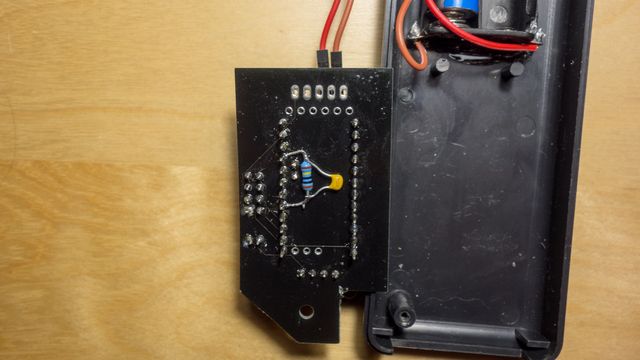
In this example A0 is used as analog PIN and two resistors with R1=1MΩ and R2=470kΩ. Those are good values to map up to 3.44V to your 1.1V reference. If you read 1023 from A0, 3.44V are attached and so on.

Since I drive my Arduinos with either 2 AA or 2 AAA batteries, the voltage will never reach more than 3V. If you need to use higher voltages, you should adjust the values accordingly."

The following formula is used to calculate the 4 relevant values (Vin is equal to VCC):

Vout=R2R1+R2Vin V_{out}={\frac {R_{2}}{R_{1}+R_{2}}}\cdot V_{in}

Alternatively you can also use one of the many online calculators3.

Code example

The following code example shows the usage of the internal reference voltage on a MySensors4 node, a complete Arduino Sketch is available on Github.

#define VMIN 1.9  // Battery Level 0%
#define VMAX 3.44  // Batter Level 100%
#define VBAT_PER_BITS 0.003362  // Volts per bit on the A0 pin, VMAX / 1023 = 3.44 / 1023 = 0.0033625

void setup()
{
  ...
  analogReference(INTERNAL);
  ...
}

void loop()
{
  ...
  int sensorValue = analogRead(BATTERY_SENSE_PIN);    // Read Analog Value
  float volt  = sensorValue * VBAT_PER_BITS;          // Calculate Voltage
  int batteryPcnt = sensorValue / 10;                 // Calculate Battery Level (Percent)
  send(voltMsg.set(volt, 2));                         // Send Voltage
  sendBatteryLevel(batteryPcnt);                      // Send Battery Level
}

Footnotes

Gallery

Tags

Comments

Related

MySensors BBQ Thermometer

Thinking about additional uses of the rather easy MySensors Framework I came across a less common but really tasty purpose: why not build a BBQ thermometer which sends it’s data to the MySensors Gateway which is then visualized in Grafana. Thermistors The sensors of BBQ thermometers are usually NTC thermistors which means, that you can measure a resistant which decreases as the temperature rises. E.g. you might measure 100kΩ at 25°C and 6kΩ at 100°C.

PCB Boards for MySensors Nodes

When I last worked with Atmel Microcontrollers in the early 2000s, it was simply unpayable to produce small batches of custom PCBs. Nowadays it’s hard to get an overview of all the companies that offer either prototype boards or small batches. Furthermore is the software by this time very advanced and the myriads of online tutorials make it easy to design simple and more complex circuits. In this post I’d like to show some of the PCBs I created and ordered and of the process to this.

FHEM - MySensors Ethernet Gateway

Damit nicht nur ein einzelnes Gerät Zugriff auf die Daten einer MySensors Node hat, wird ein Gateway benötigt. Dieses empfängt über 2.4Ghz die Daten und bietet diese über diverse Schnittstellen zur Weiterverarbeitung an. MySensors bietet mehrere Möglichkeiten ein Gateway für die Sensoren zur Verfügung zu stellen. Das Ganze reicht von einem Seriellen Gateway1 über den direkten Anschluss an einen Raspberry2 oder auch ein WLAN Gateway3. Um etwas flexibler zu bleiben habe ich mich für ein Ethernet Gateway4 entschieden.

Automatische Balkonbewässerung - Finaler Aufbau

Da nun sowohl die Software als auch Hardware einige problemlos lief, habe ich als finalen Schritt noch einen besseren Wasserbehälter als den 12 Liter Eimer gesucht. Fündig geworden bin ich bei der Firma Goebel, welche Wassertanks für den Campingbedarf anbietet. Hinter unserem Sofa sind knapp 30cm Platz zur Wand, daher passt hier der 76 Liter Tank (100cm x 40cm x 20cm) ideal. Die Einfüll und Reinigungsöffnung des Tanks ist auf der Seite, daher musste ich oben einen neuen Stutzen anbringen.

Low Power Arduino Pro Mini running at 1Mhz

After playing with the MySensors1 framework and possible sensor types, I build a prototype of a Temperature Sensor which is battery powered. The MySensors website contains a great guide on battery powered nodes2 but I wanted to go one step further and reduce the clock of the used Arduino Pro Mini from 8Mhz to 1Mhz. Jean-Matthieu DECHRISTÉ wrote an extensive article on this topic3, so this post only includes the basics.

Automatische Balkonbewässerung - Tankinhalt berechnen

Nachdem der Füllstandsensor nun zuverlässig Distanzen an FHEM sendet, kann daraus der Tankinhalt berechnet werden. Mathematik eines Eimers Die dafür nötigen Formel unterscheiden sich je nachdem, welche Form der Tank hat, als ersten Protoypen habe ich einen Putzeimer genutzt. Über dem Eimer habe ich den Ultraschallsensor angebracht und die Entfernung der Unterkante bis zum Boden mit 24cm gemessen. Der Radius in dieser Höhe beträgt 14cm, am Boden sind es 12cm.